
Windows allows you to enable dark mode in all Microsoft Office programs. Thanks to this, the app's interface will not only become black or dark gray, but, thanks to its tone, you will reduce eye strain and improve concentration.
While in the past putting dark mode in Windows was a complex process because the function was hidden in the system, now this is not the case. Modifying the interface design is fast, safe and reversible, that is, you can return to the standard aesthetics whenever you want.
So that you can use dark mode without annoying limitations, in this article you will learn how to activate it correctly so that you always have it on hand when you use it, whether you activate it in all Office programs or just in one specific one.
Methods to enable dark mode in Microsoft Office programs
The procedure is the same for any Office program, it will not matter which one you are using:
Activate "dark mode" in all programs from your account
This is the most efficient method because when you switch to dark mode, it will be applied to all Office applications, which is useful for saving time.
– Enter any Office program you want and click “File”.

– A menu will open, select “Account”.

– Now, open the options in the “Office Theme” section and choose “Black” or “Dark Gray”.

When you now access your Office programs, you will see the screen like this:

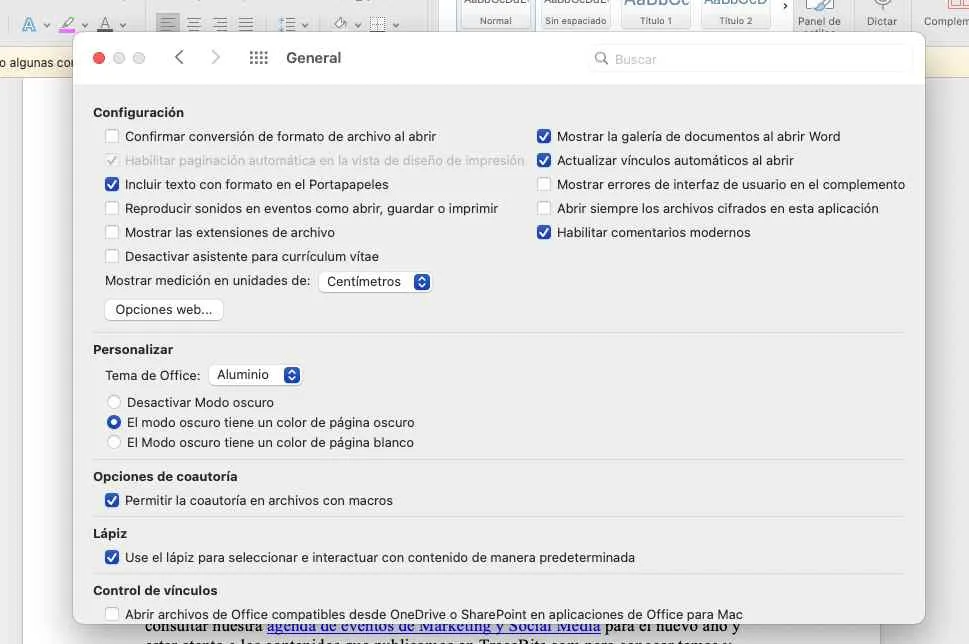
On Mac computers
On Mac computers you can also do it by accessing File / General. There in "Personalization" you can choose dark mode.
In the "View" option
If you only want to switch to dark mode on the screen of a particular program, the most effective and fastest procedure is the following:
– Once inside the Microsoft Office program, click on the “View” option located in the top menu.

– Finally, choose the “Dark Mode” function so that it is applied immediately in the app in question.

Leave a Reply