

Making a backup is something that almost no one wants to do until a scare forces you to make a backup due to the possibility of losing your files. So, just as Android offers everything necessary to make a backup on your mobile, Windows is not far behind and has its own system to safeguard all the photos, documents, chats, etc., that are stored on the computer.
To avoid being exposed to any Windows errors that arise unexpectedly, such as the blue screen of death, for example, the best thing you can do is to keep a copy of all the important content that you have saved on your computer. In this article you will learn how to make a backup in a simple, safe and fast way.
Tutorial to make a backup in Windows 11
Windows 11 allows you to make backups at any time, the procedure is as follows:
– Enter Windows “Settings” and, in the menu on the left side, click on “Accounts”.
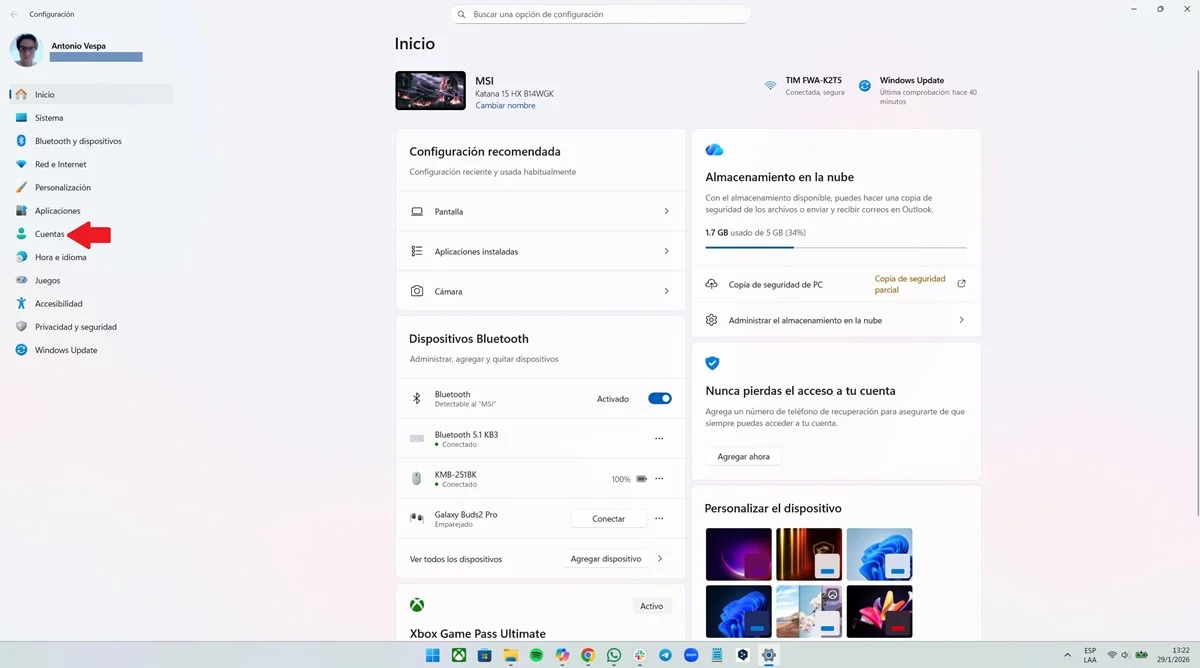
– Once inside “Accounts”, click on the “Manage sync settings” option.

– Now Windows will show you each of the sections that you can back up, such as: documents, images, desktop, music and videos. Activate the switch for the content to which you will apply the backup and press the "Save changes" button.
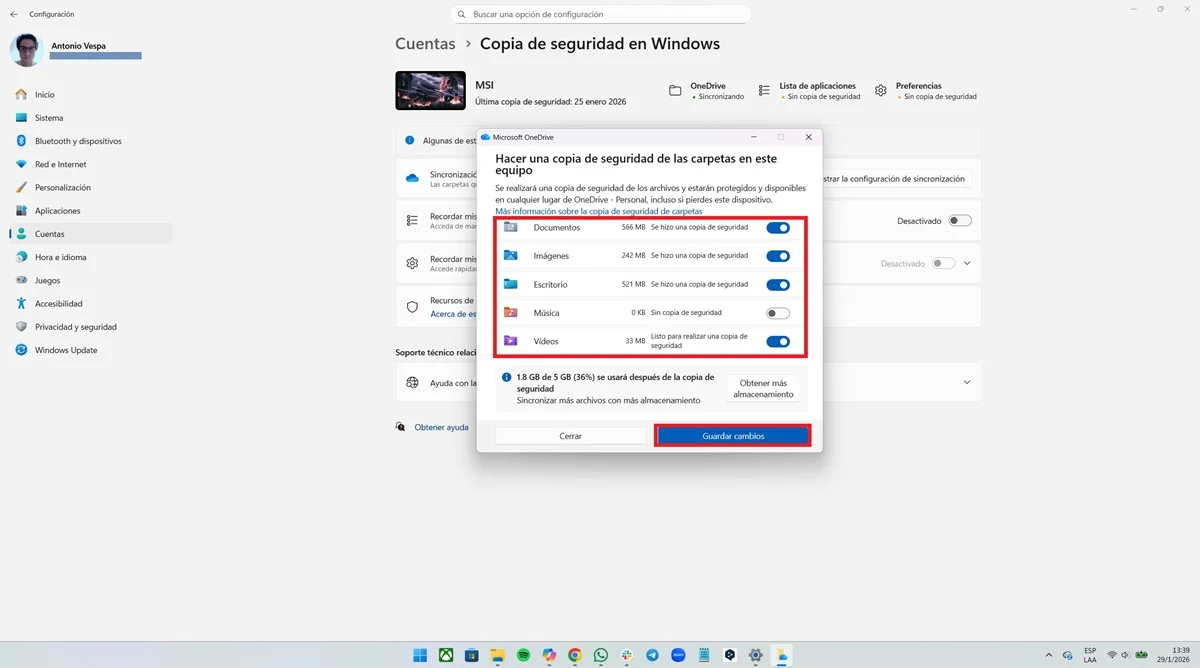
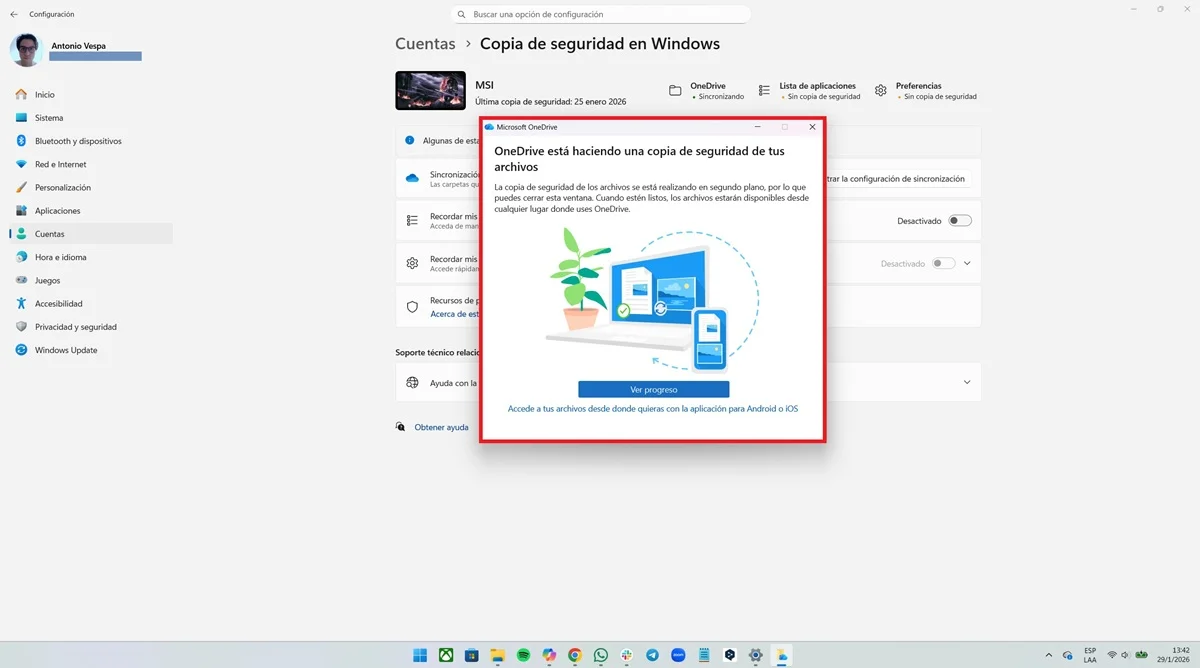
– That's all you have to do, Windows will automatically start the backup so that all your documents, videos, images, etc., are saved in the OneDrive cloud service.
Whole System Backup
If you want to have a complete backup of your entire operating system, such as applications, files, photos, videos, OS settings and more, you will need to do the following:
– Open Windows Start, type “Control Panel” and enter it.

– You will see various options, click on “System and security”.

– Click on the “Backup and restore” option.
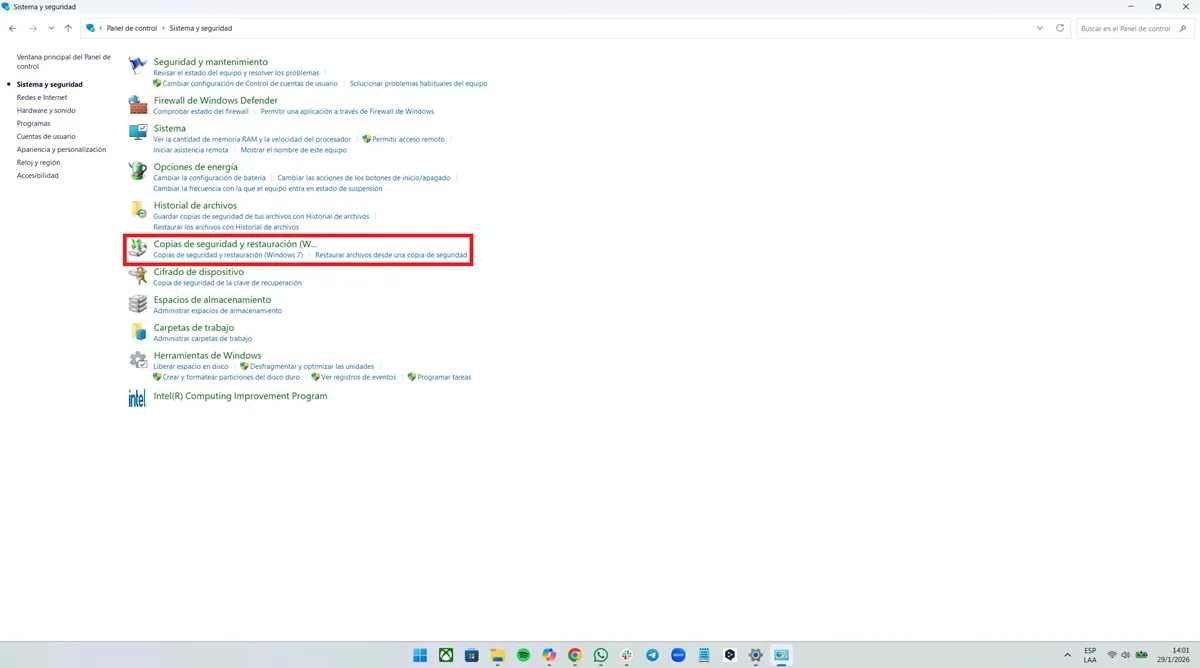
– In the options located in the left menu, click on the “Create a system image” function.
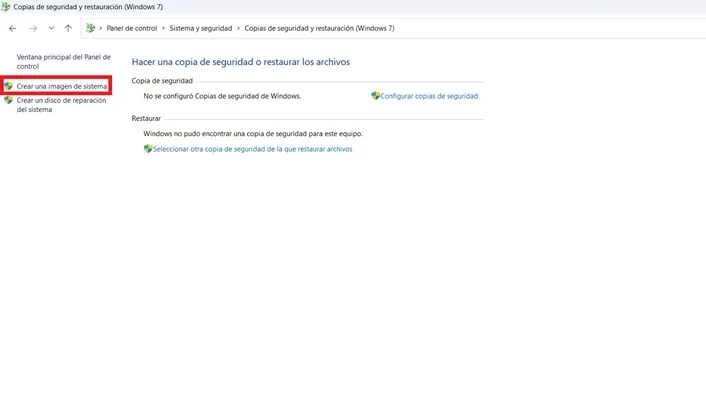
– Finally, choose where you want to save the system image and press the “Next” button to start the backup of all the programs, files and settings of your operating system.

Leave a Reply